🎮 Input Manager Setup
This is how you can easily setup your input manager
Overview
If you look under ExamineManager you will see Input Manager from here all inputs are managed.
You should have Input System package in your scene, it is already included in newer version of unity.
Input System Overview
If you look under Arc Examine System folder → InputSystem folder in that folder you will find one input system named ExamineInputSystem.

The highlighted prefab
All Input Actions are present here, and you can change all examine system inputs here.

All required inputs actions are already present here, you just need to adjust them as you like.
Explaining Input Manager script
You can drag and drop your actions from InputSystem folder from ExamineInputSystem by clicking on little arrow on it.
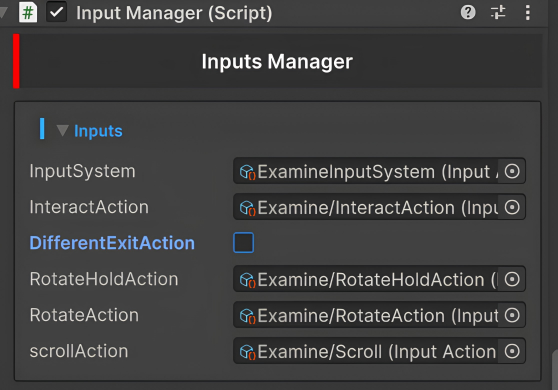
Script Properties
- InputSystem → Here you have to drag your ExamineInputSystem.
- InteractAction → This action lets you interact with examinable like entering and exiting examine state. [Default Key: [E]]
- DifferentExitAction → As InteractAction handles entering and exiting of examine state, Enable DifferentExitAction if you don't want to use InteractAction as examine state exit action.
If you enable it you will see another field named ExitAction.

- ExitAction → This action will lets you exit examine state. [Default Key : [Esc]]
-
RotateHoldAction → Hold the RotateHoldAction to start examinable object rotation, releasing it will stop the rotation. [Default Key: [Mouse Left Button]]
-
RotateAction → This is the action the rotates the examinable object and RotateHoldAction is the action that you have to hold in order to rotate. [Default: [Mouse Delta position]]
-
Scroll → This action lets you Zoom IN&Out. [Default: [Mouse Scroll]]
All action are in there the correct field already, but in any case this is the correct order to place them.
And if using DifferentExitAction
And a Player Input component should be present in object.
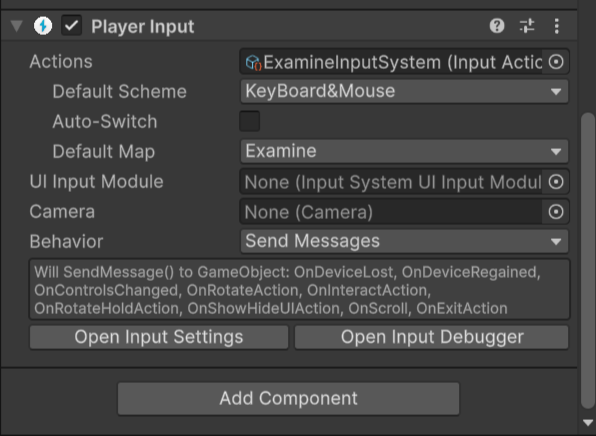
And in Actions field add your ExamineInputSystem object.
Done...✨